Rig System
Rig System
The Rig System allows the user to create different kind of advanced rigs easily with just some parameters and a template of points that can be used to define the position of the different parts of the rig. The created rig will be an open system composed by several independent components like bones, helpers, controllers and solvers that can be modified, replaced or removed by the user.
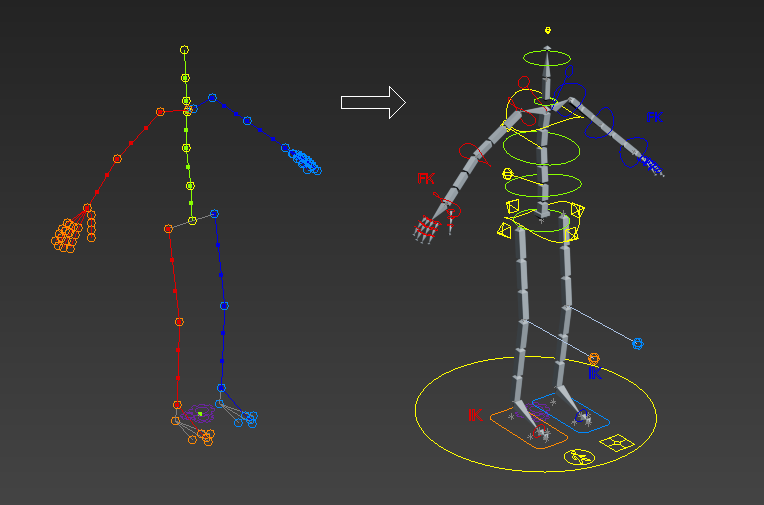
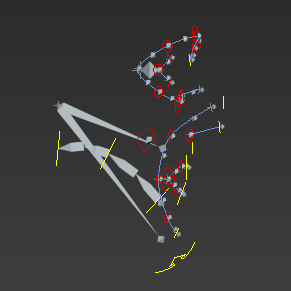
It creates rigs with a hierarchy of bones and a set of control nodes that the animator can use to manipulate the rig. All the nodes of the rig are stored in 3 different types of layers for their easy access, one for bones, one for helpers and one for control nodes. There are several types of rigs available, like biped, quadruped, centaur, insect, and different types of sub components to assamble together customized rigs.
The rig limbs can have IKFK solvers for easy animation of Inverse and Forwards kinematics. The feet can also have reverse foot with parameters for controlling different movements for walking. It can also have an IK spine, which allows the user to animate the spine of the character more easily. And the limbs can have twist bones that can be bent and stretched in a cartoony fashion way if the character requires to do so.

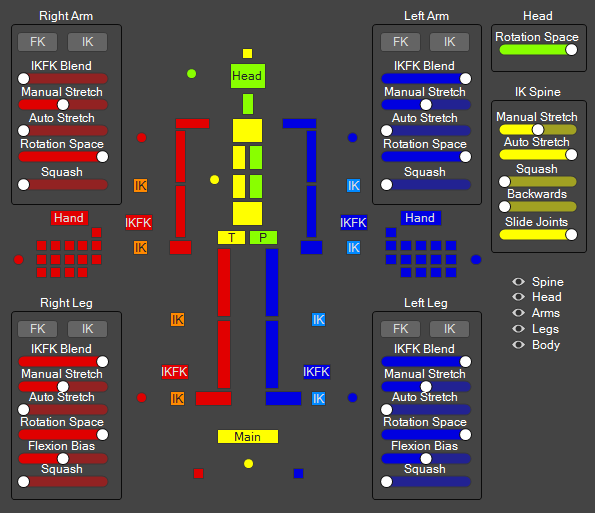
It also provides UI Panels with pickers and other UI Controls, that can be used to access and manipulate more easily the different parts of the rig.
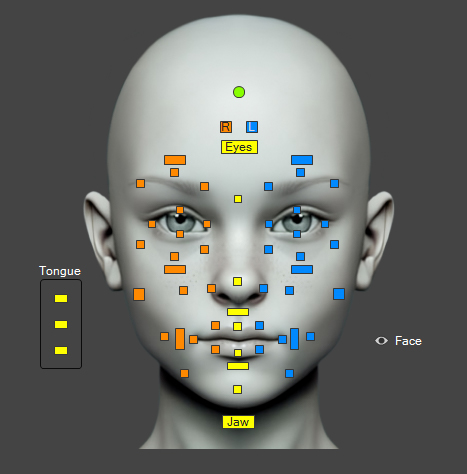
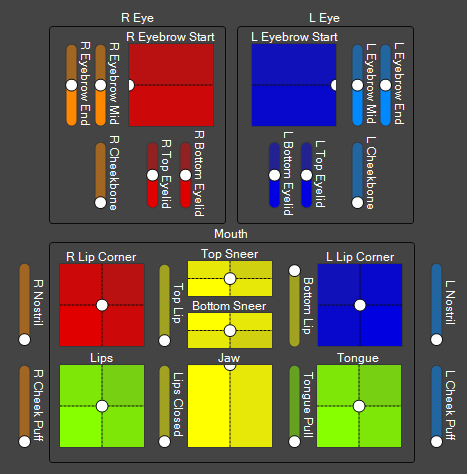
Additionaly a face rig with a bone based system can also be created by just defining the position of different points of the face in a similar way that is done with the other parts of the body of the character, this face can also have an UIPanel for accessing the controls easily. Alternatively a Morpher based system can be created, in that case the morphs can be easily animated with 2D sliders in the UI Panel of the face.
Bones Based Face UI Panel
Morpher Based Face UI Panel
Creation Method
Click and drag in the viewport to set the position and size of the Rig template. You can access all the parameter in the Modify panel, where you can choose the type of the rig, and turn on and off and change the number of it's components.
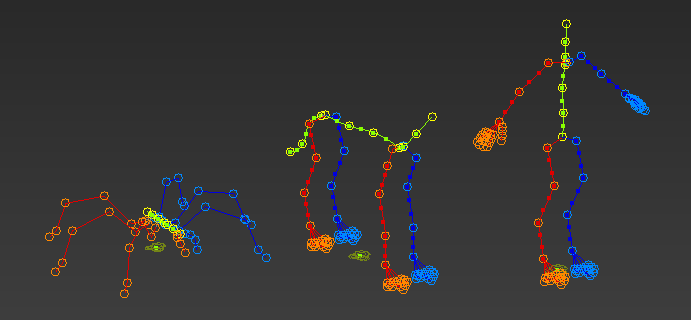
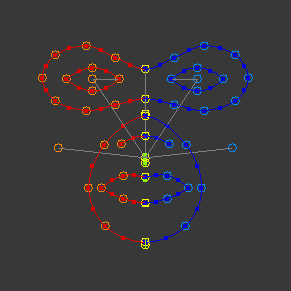
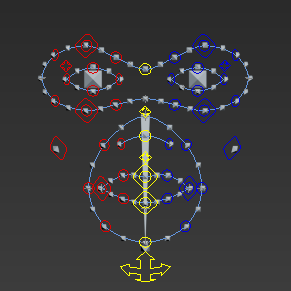
Points Template
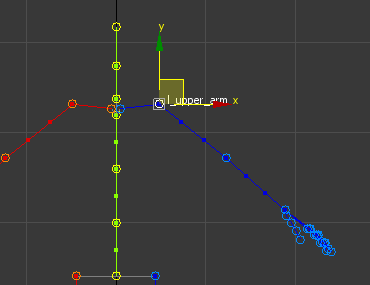
With the rig template you can manipulate several points in order to define the proportions of the different parts of the rig, you can access those points by selecting the rig system, then going to the modify panel and then press "1". You can also access them by clicking in the arrow in the left side of the word "Rig" in the base of the modifier list and then clicking in the sub object "Point". Then you can select any point and start moving it to the desired position. You can also select and manipulate several points at the same time.
After setting up the rig parameters and the template points, just press the "Create" button to create the rig with all its components.
Bones Based Face Rig
To add a face rig to your character, go to the Face rollout and turn on the "Face" checkbox, by default the bones based face rig is turned on. After this the face rig points template is displayed so you can adjust the position of the different part of the face, like the eyebrows, eyelids, nose, lips, etc. After adjusting all those points and the points of the body you can click on the create button to create the full rig.
Morpher Based Face Rig
You can also create morpher based rig interface that can be used to animate the morpher modifer. For that turn on the "morpher" radio button in the face rollout and create the rig. After that the full rig is created including a UI Panel that contains all the sliders used to animate the face morphs, those sliders are connected to an empty morpher modifier where you can assign the different morph targets.
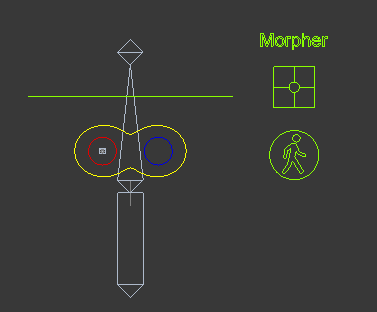
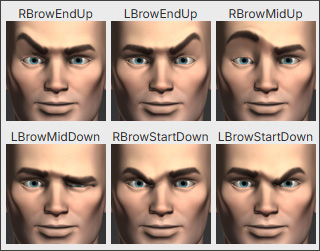
The modifier is stored in an object that is called "Morpher", you can just copy that modifier and paste it in the head mesh of your character and assign the respective morph targets. The connections with the UI Panel sliders will be kept and you can start the animation process. For a list of all the morph targets that have to be used please click here, or click in the image below.
Parameters

Create Button
Reset Button
Type
Rig Name
Size
Draw On Top
Side
Affect Children
Affect Mirror
Mirror Relative to Parent
General Parameters
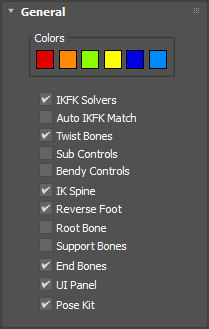
Colors
IKFK Solvers
Auto IKFK Match
Twist Bones
Sub Controls
Bendy Controls
IK Spine
Reverse Foot
Root Bone
Support Bones
End Bones
UI Panel
Pose Kit
Current Type Parameters
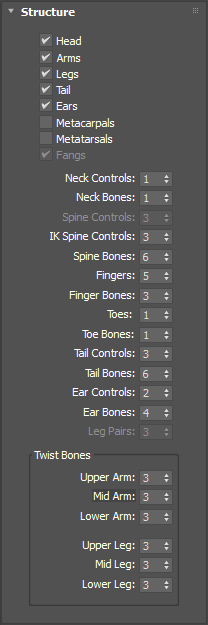
With these parameters you can enable or disable certain parts of the rig and you can change the number of components of those parts (Like number of finger, toes, spine bones, etc).
Face Parameters
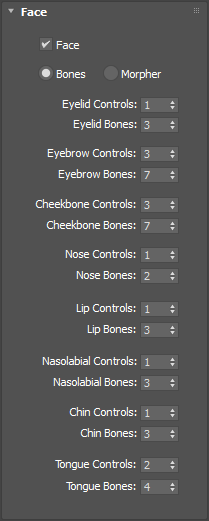
In this rollout you can define the type of the face rig, it can be either bone based or morpher based. In the case you are using a bone based system you can set the number of controls and bones for each part of the rig (eyelids, eyebrows, lips, etc). You can also enable/disable the creation of the face rig with the "face" checkbox.